3 Healthy Recipes From Erica Rodriguez’s Debut Cookbook
By
2 months ago
Nutritionist-approved dishes to try at home
We all have grand ambitions to cook healthy meals during January, but how to keep up our goals throughout the year? Recipe books which focus on nourishing meals are a great place to start – better still if they’re written by a nutritionist. Our top pick right now? The debut cookbook from Erica Rodriguez (known as @naturallynourished on Instagram). Out now, Nourished Kitchen is filled with vegetarian recipes made with nutrient-dense foods – we’ve picked out three favourites below.
3 Erica Rodriguez Recipes
Apple Pie Overnight Oats
‘The sweet aroma of apples and cinnamon filling the air is enough to make one nostalgic; that flavour combination is an all-round crowd pleaser and will likely evoke childhood memories for many of us. Although I would happily sit down at the breakfast table and finish off a big bowl of apple pie, I wanted to create an easy, fibre-rich breakfast that provides that warm comforting flavour we all know and love. Oats are a wonderful source of beta-glucans, a type of fibre that can help lower cholesterol and promote a healthy immune system. Chia seeds provide an omega-3 boost and apples are rich in quercetin, which contains antioxidant and antihistamine properties. I’m a big fan of any meal that can be prepped ahead of time, and this recipe is not only quick to prepare but even quicker to assemble the following day. It will keep well in the fridge in an airtight container for up to three days. Since the stewed apples freeze well, I recommend increasing the quantities and freezing for future meals.’

Serves 2
Ingredients:
- 100g (31/2oz/1 cup) rolled oats
- 1 apple, grated
- 2 tablespoons chia seeds
- 200ml (7fl oz/scant 1 cup) milk of your choice (oat, almond, cashew nut, etc)
- 250g (9oz/1 cup) plain yoghurt of your choice
- 1 teaspoon ground cinnamon, plus a dusting to serve
- 1 tablespoon maple syrup, plus optional extra to serve
- A handful of pecans, chopped
For the stewed apple
- 5 large apples, peeled, cored and chopped
- 1 teaspoon ground cinnamon
- ½ teaspoon ground nutmeg
- 2 tablespoons filtered water
Method:
- Make the stewed apple. Add the chopped apple, cinnamon, nutmeg and water to a saucepan over low–medium heat and cook for about 10 minutes, until the apples have softened. Remove from the heat, allow to cool, then place in the fridge in an airtight container.
- Put the oats, grated apple, chia seeds, milk, yoghurt, cinnamon and maple syrup in a large mixing bowl and stir well to combine. Don’t worry if it looks a little bit runny; the mixture will thicken up overnight. Transfer to an airtight container and leave in the fridge until the next morning.
- When you’re ready to serve, add a portion of the oat mixture to a bowl and top with the stewed apple. Alternatively, you can layer the oats and stewed apple in a jar or glass. Finish with some chopped pecans, a light sprinkle of ground cinnamon, and if you like, a drizzle of maple syrup.
Note: You might have some stewed apple left over – you can store this in the fridge for a few days or pop it in the freezer for future use; it will keep for a few months.
Benefits:
- Fibre-rich
- Good source of quercetin
- Good source of magnesium
- Supports cardiovascular health
- Supports hormonal balance
- Anti-inflammatory
- Source of omega-3
- Supports gut health
- May help regulate blood sugar levels
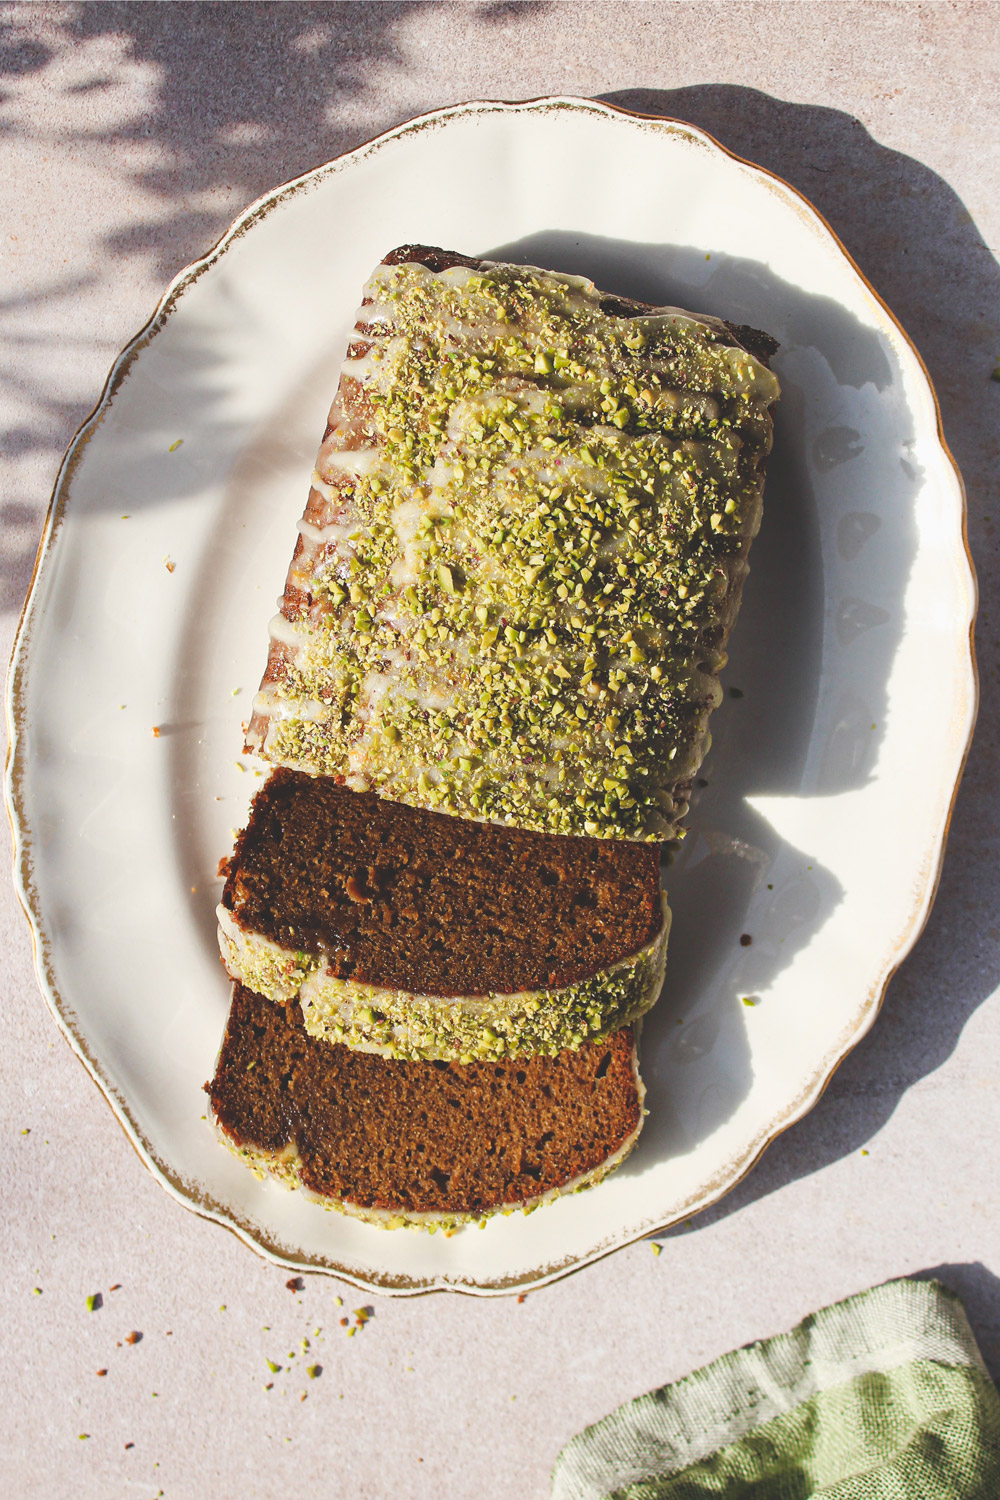
Orange & Pistachio Loaf
‘Whether it’s offered in the form of cake, ice cream or a colour swatch, pistachio has a tendency to lure me in every time! There is just something about the colour and delicate flavour I find very appealing and it lends itself very well to baking recipes. Chlorophyll, a plant pigment present in many fruits and vegetables, is responsible for the green hue of pistachios and contains antioxidant properties, helping to protect the body against oxidative stress. In this recipe, I have paired pistachio with the citrusy notes of orange, including plenty of the zest, which not only intensifies the flavour, it also provides a source of hesperidin – a phytonutrient with potent anti-inflammatory actions. This loaf is delicious eaten on its own or with some thick, creamy yoghurt.’
Serves 10 – 12
Ingredients:
Dry ingredients
- 200g (7oz/11/2 cups) plain (all-purpose) flour
- 90g (31/4oz/scant 1/2 cup) coconut palm sugar
- 1 teaspoon baking powder
- ¼ teaspoon salt
Wet ingredients
- 2 large (US extra large) eggs
- juice and zest of 1 large orange
- 1 teaspoon vanilla extract
- 150ml (51/2fl oz/scant 2/3 cup) extra virgin olive oil
- 80ml (21/2fl oz/ 1/3 cup) honey
For the glaze
- 80g (23/4oz/heaped 1/2 cup) icing (powdered) sugar
- 2 tablespoons orange juice
- Zest of ½ orange
- 2 tablespoons pistachios, finely chopped
Method:
- Preheat the oven to 200°C (400°F) / 180°C (350°F) fan / gas 6. Line a 21cm x 11cm (81/4 x 41/4 in) loaf pan with parchment paper.
- In a large bowl, mix together the dry ingredients. In a separate bowl, whisk the eggs, then add the rest of the wet ingredients and combine well. Mix together the wet and dry mixtures until well incorporated.
- Pour the batter into the lined loaf pan and bake in the preheated oven for 35–40 minutes.
- To test if the cake is cooked through, insert a metal skewer into the middle, and if it comes out clean, the cake is ready.
- Make the glaze. Put the icing sugar in a bowl and, little by little, add the orange juice and mix with a spoon, until it reaches a thick consistency but it is runny enough to drizzle on top of the cake. Add the orange zest and give it a stir to combine. You can add more sugar or orange juice if required.
- Remove the cake from the oven, allow to cool slightly, then remove it from the pan onto a cooling rack. Once the cake has cooled down completely, drizzle the glaze over the top and finish with the chopped pistachios.
Benefits
- Antioxidant properties
- Good source of hesperidin
- Good source of omega-9
- Promotes healthy blood vessels
- Promotes a healthy gut microbiome
- Neuroprotective properties
- Source of biotin
- Promotes cardiovascular health
- Source of copper
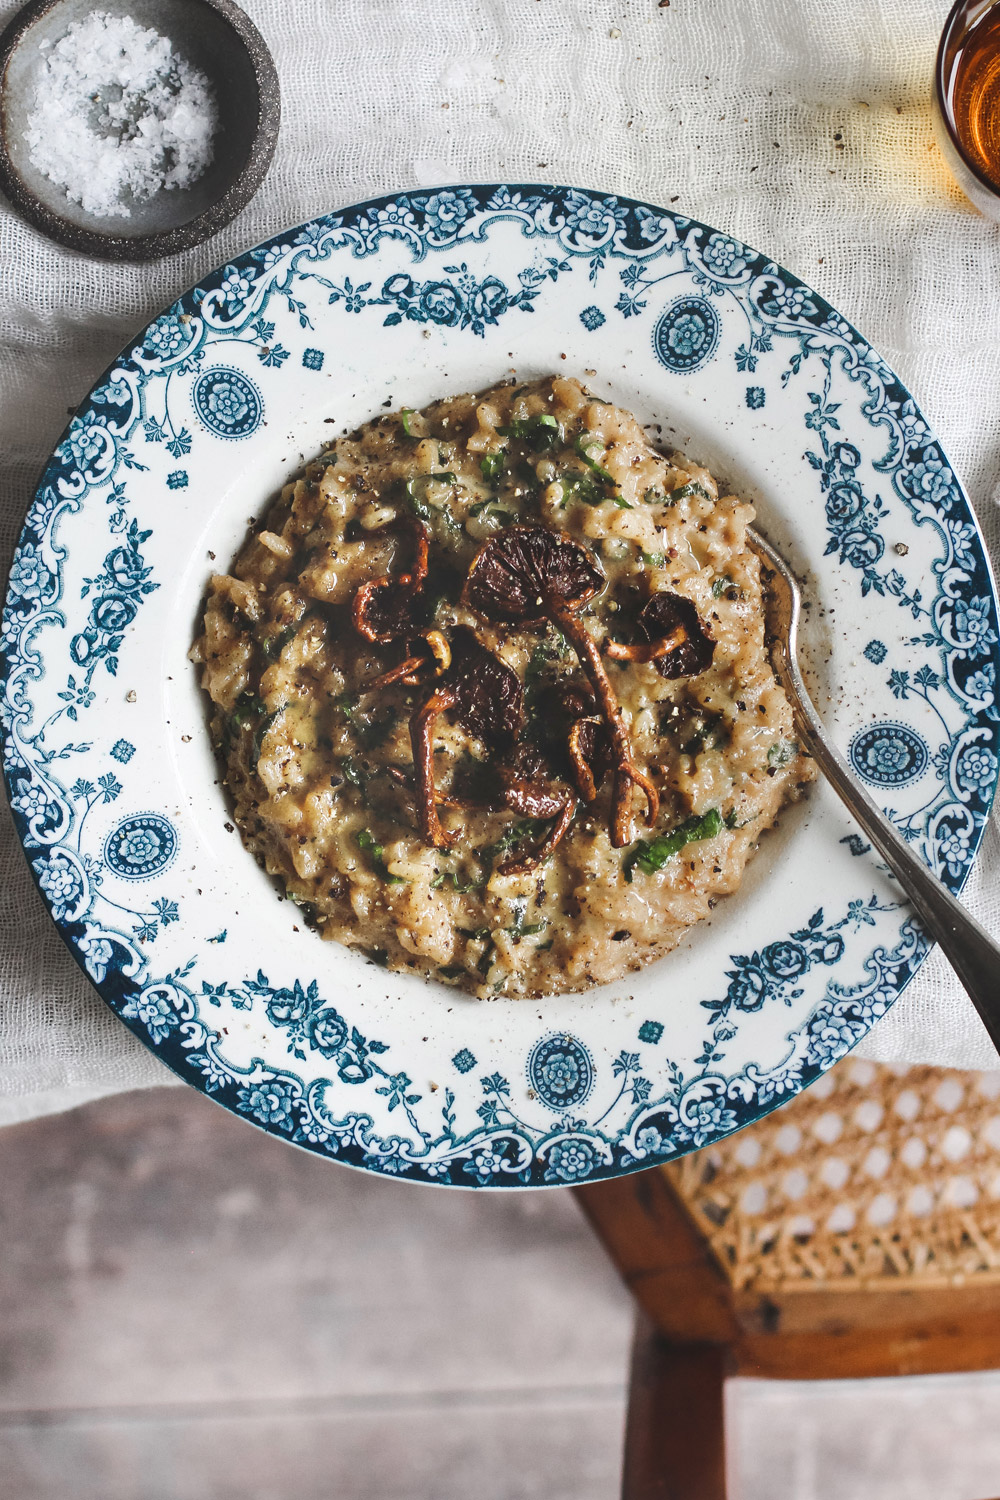
Wild Garlic and Woodland Mushroom Risotto
‘Wild garlic (ramps) is such a treat and one that arrives in the late spring. I’m fortunate enough to find it in abundance on my local walks; the sweet garlic aroma that fills the air will lead you to the magic spot where it grows. It’s like finding treasure. In this recipe, I have used a wild variety of mushrooms sourced from my local farmers’ market; however, please feel free to use any other kind of wild mushroom, such as oyster or chanterelle. I recommend not omitting the porcini powder and white wine; they deliver a wonderful depth of flavour to this wild, rich and superbly comforting dish.’
Serves 2
Ingredients:
- 50g (13/4oz) wild garlic (ramps)
- 1.25 litres (44fl oz/51/2 cups) vegetable stock
- 50g (13/4oz/31/2 tablespoons) butter
- 1 medium onion, finely chopped
- 3 garlic cloves, finely chopped
- A pinch of salt
- 200g (7oz) arborio rice
- 200ml (7fl oz/scant 1 cup) dry white wine
- 2 teaspoons porcini powder
- 50g (13/4oz) wild mushrooms
- 50g (13/4oz) Parmesan, finely grated, plus extra to serve
- Freshly ground black pepper
Method:
- Rinse the wild garlic and pat dry with a paper towel. Chiffonade the leaves: trim the stalks, roll a stack of the leaves around each other like a cigar, and cut into thin strips. Set aside.
- Bring the stock to a boil in a saucepan, then reduce to a low simmer; you want to keep the stock hot throughout the cooking time.
- In a large saucepan, warm 20g (11/2 tablespoons) of the butter over low–medium heat, add the onion, garlic and a pinch of salt and cook for 6–8 minutes, until the onion is soft and translucent.
- Add the rice to the pan and heat through until all the grains are hot, then turn up the heat, stir in the white wine and cook until it has completely reduced down. Add the porcini powder and a ladle of the hot stock, reduce the heat slightly and keep stirring until it has all been absorbed. Continue to add small amounts of the stock, allowing it to fully absorb into the rice before adding more. Cook for about 25 minutes, until the rice is tender and creamy.
- Meanwhile, heat another 10g (2 teaspoons) of the butter in a separate frying pan over medium–high heat, add the mushrooms and sauté for several minutes, until they are browned and caramelised.
- Next, add the Parmesan and the remaining butter to the risotto, quickly stirring it through, until it reaches a creamy consistency, then season with more salt and black pepper, if required. Remove from the heat and stir through the wild garlic, adding a little more of the hot stock, if required.
- Serve the risotto into bowls and top with the mushrooms, some extra Parmesan and some freshly ground black pepper.
Benefits
- Antimicrobial properties
- Fibre-rich
- Good source of B vitamins (not B12)
- Promotes energy production
- Supports immune system function
- Supports blood sugar regulation
- Supports cardiovascular health
- Promotes gut health
- Anti-inflammatory

Nourished Kitchen (Carnival) is out now