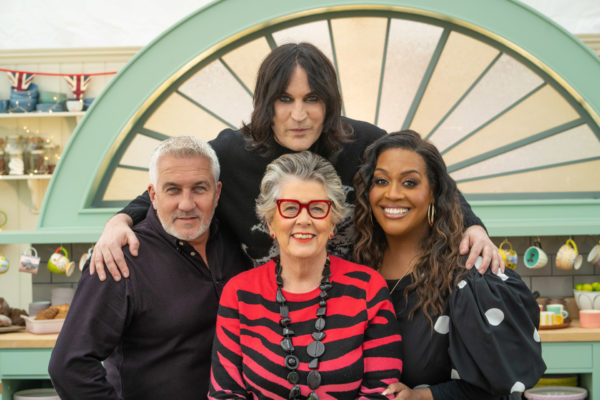
Keen Baker? Try Your Hand At These Great British Bake Off Technical Challenges
By
3 years ago
Follow the bakers with these Technical Bakes
Have you been keeping up with the current series of Great British Bake Off? Chances are, any burgeoning bakers will likely be feeling inspired by all of the fun recipes on screen – but the creative bakes are only half the fun. Try your hand at one of Great British Bake Off‘s Technical Challenges from this season, starting with the iconic GBBO chocolate fudge cake…
Keep Up To Date With Great British Bake Off (And Its Technical Challenges) Here
Great British Bake Off Technical Challenges From Series 14
Week One: Cake Week
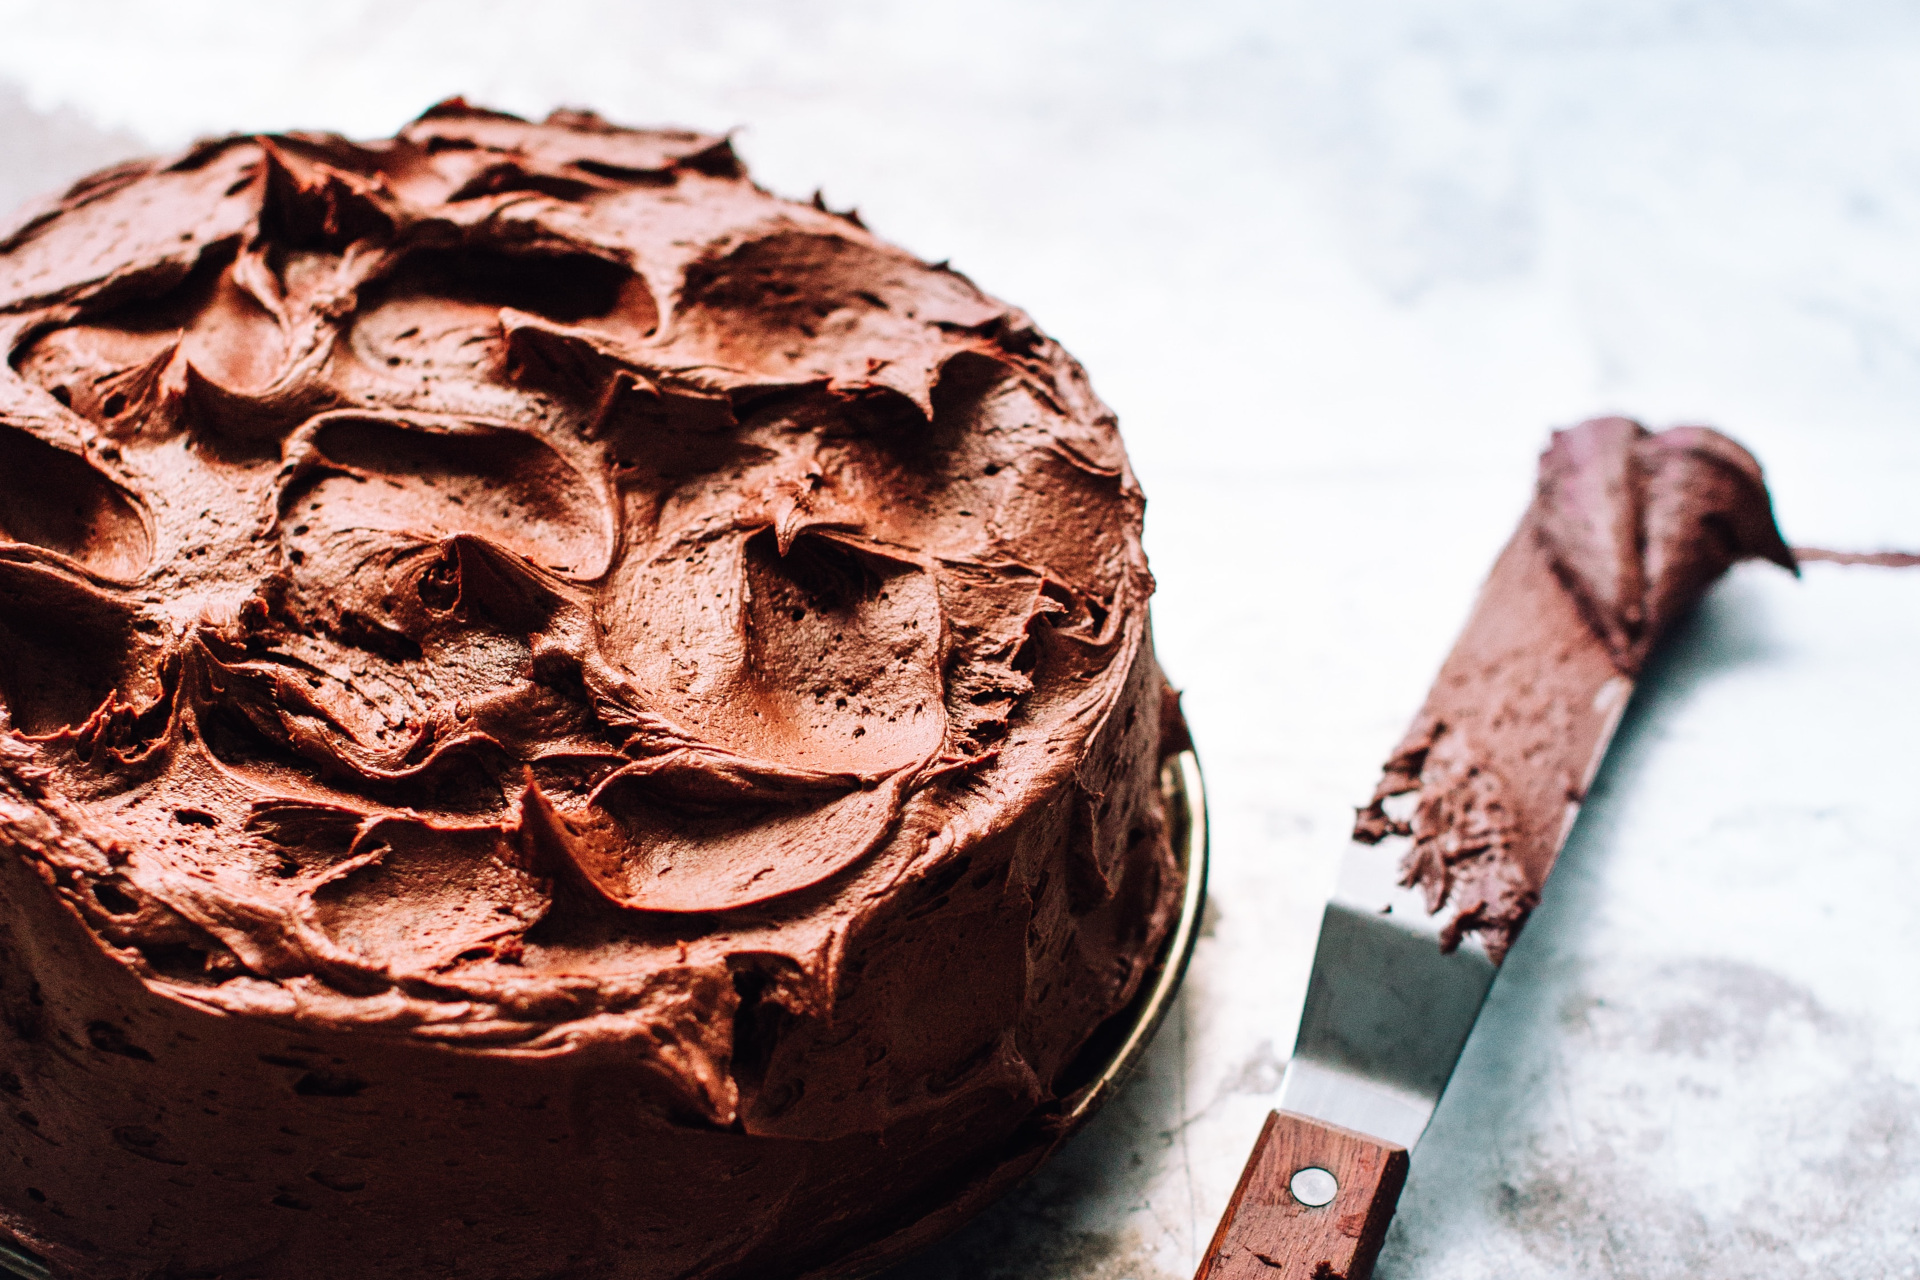
Paul Hollywood’s Chocolate Fudge Cake (aka THE fudge cake)
This season kicked off with a bang, with Paul Hollywood pulling out the big guns with the week one Technical Challenge: the iconic Great British Bake Off chocolate fudge cake. It’s a fun one to make at home (with or without the kids), and promises ultimate satisfaction as you fill up the infamous ‘missing raspberry’ gap.
View this post on Instagram
Serves: 16
Baking Time: 40 minutes
Ingredients
For The Sponge
- 175g dark chocolate, 54%
- 150g unsalted butter, diced
- 125ml hot water
- 3 medium eggs
- 125ml sour cream, at room temperature
- 50ml vegetable oil
- 2 tsp vanilla extract
- 150g caster sugar
- 150g light soft brown sugar
- 250g self-raising flour
- 50g cocoa powder
- 1½ tsp bicarbonate of soda
- ¼ tsp salt
For The Chocolate Ganache
- 300g dark chocolate, 54%
- 25g unsalted butter, diced
- 450ml double cream
To Decorate
- 400g raspberries
Method
- Heat the oven to 180°C/160°C fan/350°F/Gas 4.
- For the sponges, grease and base line 2 x 20cm sandwich tins with butter and baking parchment. Combine the chocolate, butter and water in a heat-proof bowl and set over a pan of barely simmering water. Stir until melted and then whisk to combine. Remove the bowl from the heat and leave to cool slightly.
- In a large mixing bowl use a balloon whisk to mix the eggs, sour cream, oil and vanilla until combined. Add both sugars and whisk until smooth. Add the melted chocolate mixture and whisk again until smooth.
- Sift the flour, cocoa, bicarbonate of soda and salt into the bowl and whisk until thoroughly combined. Divide the mixture evenly between the prepared tins and level with a palette knife. Bake for about 35-40 minutes until a wooden skewer inserted into the centre of the sponges comes out clean.
- Leave the sponges to cool in the tins for 10 minutes and then carefully remove from the tins and leave to cool completely on a wire rack.
- For the ganache measure the chocolate and butter into a heatproof bowl and set aside. Pour the cream into a medium saucepan and slowly bring just to the boil. Remove from the heat and pour over the chocolate and butter. Leave the hot cream to melt the chocolate without stirring for 1 minute and then stir until smooth and glossy. Once smooth, leave it to cool and thicken before using.
- Place one of the sponges on a cake stand and spread approximately 6 tablespoons of the ganache over the top with a palette knife or spoon. Top with the second sponge, turned upside down so the flat side is the top of the cake. Gently press the two cakes together. Cover the top and sides of the cake with the remaining ganache and roughly smooth the sides. Arrange the raspberries on top.
Week Two: Biscuit Week
Prue Leith’s Custard Creams
Possibly the nation’s favourite biscuit (topped only by the Digestive, maybe), custards creams have had a home in the UK since the 1900s. Prue Leith’s recipe ensures a silky-smooth filling and the recognisable ‘custard cream’ stamp that makes these biscuits so deliciously dunkable.
View this post on Instagram
Makes: 12
Hands-On Time: 1 Hour (plus chilling)
Baking Time: 15 Minutes
Ingredients
For The Biscuits
- 100g unsalted butter, cubed and softened
- 100g caster sugar
- 1 egg
- 1⁄2 tsp vanilla extract
- 175g plain flour
- 35g custard powder
For The Crème Au Burre
- 65g caster sugar
- 2 egg yolks
- 20g custard powder
- 150g unsalted butter, cubed and softened
Equipment
- Custard cream biscuit cutter and stamp
- 2 baking sheets, lined with baking paper
- Sugar thermometer
- Medium piping bag fitted with a medium plain nozzle
Method
- Make the biscuits. Beat the butter and sugar in a stand mixer fitted with the beater, on medium speed for 2-3 minutes, until light and creamy. Add the egg and vanilla and thoroughly mix.
- Sift in the flour and custard powder and mix by hand to a crumbly dough. Bring the dough together with your hands and knead it gently on a lightly floured work surface until smooth. Do not overwork the biscuit dough.
- Divide the dough in half and shape each half into a flat disc, then wrap and chill them for 1 hour.
- Roll out one of the discs of dough on a lightly floured work surface until about 3mm thick. Lightly flour the custard cream biscuit cutter and stamp, then cut out and stamp 12 biscuits, flouring the cutter and stamp each time.
- Place the biscuits on one of the lined baking sheets and chill them while you roll out the remaining dough to make 12 more custard cream biscuits. Chill the biscuits for 30 minutes and heat the oven to 170°C/150°C fan/325°F/Gas 3.
- Bake the biscuits for 12-14 minutes, until the edges start to turn a golden colour. Leave them to cool on the baking sheets for 5 minutes, then transfer them to a wire rack to cool completely.
- Make the crème au beurre. Tip the sugar into a small pan, add 2 tablespoons of water and bring it to the boil. Boil the mixture until the temperature on the sugar thermometer reaches 115°C/239°F.
- Put the egg yolks in the bowl of stand mixer fitted with a whisk and whisk on low speed. Slowly and carefully pour the hot sugar syrup over the egg yolks, then increase the speed to high and whisk until the mixture is thick and leaves a ribbon trail when you lift the whisk. Sift the custard powder over the surface of the mixture and whisk again until the mixture is cool to the touch.
- A little at a time, gradually add the butter, whisking continuously until incorporated. Spoon the crème au beurre into the piping bag fitted with the medium plain nozzle and chill it until you’re ready to assemble the biscuits.
- Assemble the custard creams. Turn 12 of the biscuits design-side down and pipe equal amounts of the crème au beurre around the edges and in the middle of each one. Sandwich with the remaining 12 biscuits, design-side out, on top, then chill the biscuits until the filling is firm. They will keep for up to 3 days in an airtight box.
Week Three: Bread Week
Paul Hollywood’s Devonshire Splits
It’s Bread Week on the Great British Bake Off, which means Paul’s in his element this time round – and in true Hollywood fashion, he’s set quite the Technical Challenge: Devonshire Splits. Paul’s dad used to make these in his bakery, so no pressure trying to get a perfect bake going.
View this post on Instagram
Makes: 8
Difficulty: Needs skill
Hands-On Time: 1 Hour (plus rising)
Baking Time: 15 Minutes
Ingredients
For The Dough
- 335g strong flour, plus extra for dusting
- ½ tsp salt
- 25g caster sugar
- 9g fast-action dried yeast
- 215ml whole milk
- 25g unsalted butter, at room temperature, cubed
- oil, for greasing
For The Jam
- 100g strawberries
- 125g jam sugar
For The Chantilly
- 400ml double cream
- ½ tsp vanilla extract
- 15g icing sugar
To Decorate
- 8 small strawberries, hulled & thinly sliced
- 1 tbsp icing sugar for dusting
Method
- For the dough, tip the flour into a large bowl. Add the salt and sugar on one side, the yeast on the other. Heat the milk in a small pan until warm but not hot. Add the butter and ¾ of the milk to the flour, then turn the mixture round with the fingers of one hand.
- Add the remaining milk a little at a time, mixing until you have taken in all the flour and the dough is soft and slightly sticky.
- Oil the worktop to prevent sticking. Knead the dough on it for at least five minutes until smooth and no longer sticky. Lightly oil the bowl, return the dough to it and cover. Leave to rise, until doubled in size.
- For the jam, place the strawberries in a small deep-sided saucepan and crush them with a masher. Add the sugar and bring to the boil over a low heat until the sugar has melted. Increase the heat and boil for 4 minutes. Remove from the heat and carefully pour into a heat-proof bowl. Leave to cool and chill to set.
- Line two baking trays with baking parchment. Scrape the dough out of the bowl onto a lightly floured surface and fold inwards repeatedly until all the air has been knocked out and the dough is smooth. Divide into 8 pieces.
- Roll each piece into a ball by placing it into a cage formed by your hand on the work surface and moving your hand in a circular motion, rotating the ball rapidly.
- Put the balls of dough on the prepared baking trays, placing them slightly apart. Place each tray in a clean plastic bag or loosely cover with clingfilm and leave to prove for about 40 minutes until the rolls have doubled in size.
- Heat the oven to 200°C / Fan 180°C / 400°F / Gas 6 and bake for 12-15 minutes, until the rolls are golden and sound hollow when tapped underneath. Place on a wire rack to cool.
- For the chantilly, whip the cream, vanilla and icing sugar until it holds a medium firm peak and chill until ready to fill the buns. Using a serrated knife cut a deep slit into the top of each bun. Spread the jam on both sides of the split then generously fill each bun with whipped cream. Using a palette knife, smooth the cream flush with the top of the bun.
- To decorate, lay the strawberry slices in a line along the length of the cream filling, gently pressing them into the cream until flush. Dust with icing sugar to serve.
Week Four: Chocolate Week
Prue Leith’s Caramelised White Chocolate & Blackcurrant Cheesecakes
This chocolatey Technical involves baking white chocolate in a low oven to create ‘blonde’ chocolate through caramelisation. There’s quite a few steps involved (and a lot of ingredients), so it’s worth taking your time with this one.
View this post on Instagram
Makes: 6
Ingredients
For The Biscuit Base
- 30g plain flour
- pinch of salt
- 30g porridge oats
- 30g caster sugar
- 50g unsalted butter
- 35g runny honey
For The Blackcurrant Jelly
- 2½ platinum-grade gelatine leaves
- 150g blackcurrants, fresh, or frozen and defrosted
- 50g caster sugar
For The Caramelised White Chocolate
- 170g white chocolate, chopped
For The Filling
- 135g full-fat cream cheese
- 1 egg
- 1 egg yolk
- 1 tsp cornflour, sifted
- 100ml double cream
For The Chocolate Decoration
- 100g white chocolate, chopped
To Decorate
- 125ml double cream
- ¼ tsp vanilla extract
- 2 tsp icing sugar, sifted
- 6 blackcurrants and blackcurrant leaves (optional)
Equipment
- Baking tray, lined with baking paper
- 15 x 10cm shallow tray, lined with a silicone mat
- 7cm x 6-hole silicone mould; or 7cm chef’s rings x 6, lined with baking paper
- Cooking thermometer
- Sheet of acetate
- 7cm round cutter
- Small piping bag fitted with a small ribbon nozzle
Method
- Make the biscuit base. Heat the oven to 190°C/170°C fan/375°F/Gas 5. Tip the flour, salt, oats and caster sugar into a large bowl. Using your fingertips, rub 15g of the butter into the flour mixture until it resembles breadcrumbs. Stir in the honey, then sprinkle the crumb mixture evenly over the lined baking tray and bake for 8-10 minutes, until golden. Remove from the oven and leave the biscuit crumbs to cool on the tray. Turn the oven down to 170°C/150°C fan/335°F/Gas 3
- Make the blackcurrant jelly. While the crumbs are baking, soak the gelatine leaves in a bowl of cold water for 5 minutes to soften. Place the blackcurrants in a mini food processor and blitz to a purée.
- Pass the blackcurrant purée through a fine-mesh, nylon sieve into a small pan, then add the sugar and 3 tablespoons of water. Place the pan on a medium heat and bring the blackcurrant purée to the boil, then remove from the heat.
- Drain the gelatine leaves, squeezing out any excess water, then add them to the hot purée. Stir to melt the gelatine, then pour the blackcurrant mixture into the silicone-lined tray in an even layer. Leave to cool, then chill for 30 minutes, until set.
- Finish the cheesecake base. Blitz the cooled biscuit into fine crumbs in a food processor.
- Melt the remaining 35g of butter in a small pan, remove the pan from the heat and stir in the biscuit crumbs until coated and combined. Divide the mixture equally between the 6 holes of the silicone mould or 6 chef’s rings, pressing it down with the base of a glass or the end of a rolling pin to an even layer. Chill in the freezer for 10 minutes to firm up.
- Make the caramelised white chocolate. Tip the white chocolate into a heatproof bowl and microwave it on high for 30 seconds, then stir it with a spatula. Repeat the 30 seconds in the microwave between 15 and 20 times, stirring after every 30 seconds, until the chocolate is golden brown in colour – take care as the bowl will get very hot; use oven gloves each time you remove it from the microwave to stir. During the process, the chocolate becomes lumpy and chalky, but keep stirring it until it’s smooth again. Once it’s ready, leave it to cool while you prepare the rest of the filling.
- Make the filling. Beat the cream cheese in a stand mixer fitted with the beater, on medium speed until smooth. Add the egg and egg yolk and continue to beat until smooth again. Add the caramelised chocolate, cornflour and cream, then beat on low speed until well mixed.
- Pour equal amounts of the filling over each biscuit base and bake for 25-30 minutes, until the cheesecakes start to brown, but still have a slight wobble in the centre. Remove them from the oven, leave them to cool, then chill until firm.
- Make the chocolate decoration. First, temper the white chocolate by melting 75g of the white chocolate in a heatproof bowl set over a pan of gently simmering water. Heat it until it reaches 40°C (104°F) on the cooking thermometer, stirring occasionally so it melts evenly. Remove the bowl from the pan and leave it to stand for 10 minutes, then stir in the remaining chocolate. Stir continuously until the chocolate cools to 25°C (77°F), then place the bowl back over the pan of simmering water and stir until the chocolate reaches 27°C (81°F).
- Lay the sheet of acetate on your work surface and, using a palette knife, spread the tempered white chocolate on top in an even layer, about 3mm thick. Leave for 10 minutes, until almost set, then cut the chocolate into triangles of about 9 x 9 x 4cm. Leave the chocolate triangles to set completely, then carefully peel them off the acetate.
- Assemble the cheesecakes. Once chilled, pop the cheesecakes out of the moulds and place each one on a serving plate. Using the 7cm round cutter, cut 6 rounds from the set blackcurrant jelly and place one on top of each cheesecake.
- Decorate the cheesecakes. Whip the double cream, vanilla and icing sugar together to medium peaks, then spoon the sweetened cream into the small piping bag fitted with a small ribbon nozzle. Pipe a wavy line down the middle of each cheesecake, then position a white chocolate triangle at one end. Finish with blackcurrants and blackcurrant leaves, if using.
Week 5: Pastry Week
Paul Hollywood’s Dauphinoise Potato & Caramelised Onion Pithivier
It’s too flat, the potatoes are too hard, and the pastry is raw: this Technical Challenge was a tough one. Luckily, bakers at home can take their time carefully crafting the pastry, cooking the dauphinoise and caramelising the onions to perfection. Here’s exactly how.
View this post on Instagram
Ingredients
For the filling
- 750g charlotte potatoes
- 300ml double cream
- 300ml whole milk
- 2 garlic cloves, finely chopped
- 1 tbsp olive oil
- Large knob of unsalted butter
- 2 onions, finely sliced
- Freshly grated nutmeg
- Crushed sea salt and freshly ground black pepper
For the cheat’s rough puff pastry
- 400g plain flour
- pinch of salt
- 65g unsalted butter, cubed and chilled
- 120-150ml ice-cold water
- 160g frozen unsalted butter, grated
- 1 egg, beaten to glaze
For the sauce
- 10g unsalted butter
- 10g plain flour
- 75g roquefort
- 2tbsp chopped tarragon leaves
Equipment
- baking sheet, lined with baking paper
Method
- Make the filling. Slice the potatoes very thinly either by hand or using a mandoline. Heat the cream, milk and garlic in a large pan. Add the potatoes, bring to the boil, then reduce the heat and simmer gently for 10-15 minutes, until the potatoes are tender but not soft. Drain the potatoes in a sieve, reserving the milky liquid. Spread the potatoes out on a large tray to cool, then chill until needed.
- Heat the oil and butter in a large frying pan. Add the onions and cook on a low heat until soft, translucent and lightly caramelised. Remove from the heat and leave to cool, then chill until needed.
- Make the cheat’s rough puff. While the filing is chilling, mix the flour and salt together in a large bowl. Rub in the chilled butter using your fingertips until the mixture resembles breadcrumbs. Gradually add enough of the ice-cold water to form a ball of dough.
- Lightly flour the work surface and roll the dough out to a 45 x 15cm rectangle.
- Scatter half of the frozen grated butter over the bottom two-thirds of the dough. Fold down the top third and fold up the bottom third as if folding a letter.
- Turn the folded dough 90 degrees and roll it out again into a 45 x 15cm rectangle. Repeat the process, adding the remaining frozen butter and fold as before. Wrap the dough and leave it to chill in the freezer for 15 minutes, or fridge for 30 minutes.
- Repeat the rolling and folding process one more time, this time without the butter. Wrap the dough and leave it to chill in the freezer for 15 minutes, or fridge for 30 minutes.
- Assemble the pithivier. Lightly flour the work surface and roll out just under half (two-fifths) of the pastry until about 3mm thick, then cut out a 26cm-diameter disc. Place the disc on the lined baking sheet and cover it with a sheet of baking paper. Roll out the remaining pastry and cut a second disc, about 28cm in diameter. Set the larger disc aside.
- Layer the cold potatoes and onions on top of the smaller pastry disc, seasoning them between each layer with salt and pepper and a sprinkling of nutmeg. Aim to create a slightly domed shape and leave a 2cm border around the edge. Brush the pastry border with beaten egg, then gently lay the larger pastry disc over the filling. Press the edges firmly together to seal, then brush the top with beaten egg.
- Scallop the base by using your index finger to push down on the edge of the pastry and the finger and thumb of your other hand to pinch the pastry either side.
- Holding a small knife blade at right angles to the side of the pastry, ‘knock up’ the edges by making small indentations around the base. Brush the top of the pastry with more beaten egg to glaze, then chill the pithivier in the freezer for 15 minutes, or fridge for 30 minutes.
- Brush the top again with the beaten egg and make a small hole in the centre of the domed top. Using the tip of a knife, score curved lines over the top, running downwards from the hole in the middle to the base, and taking care not to cut all the way through the pastry. Brush the top with beaten egg, then chill the pithivier in the freezer for a further 15 minutes, or fridge for 30 minutes.
- Meanwhile, heat the oven to 200°C/180°C fan/400°F/Gas 6.
- Bake the pithivier for 35-40 minutes, until the pastry is golden and crisp.
- Make the sauce. While the pithivier is baking, melt the butter in a small pan on a medium heat. Add the flour and stir with a wooden spoon to a paste. Stir the paste over a low heat for 2-3 minutes to cook out the flour flavour, then gradually add the reserved milky liquid (from Step 1), stirring continuously to a smooth sauce. Add the roquefort and tarragon and season to taste with pepper (it shouldn’t need salt).
- Remove the baked pithivier from the oven and leave it to cool slightly before serving with the sauce for pouring over.
Week 6: Botanicals Week
Prue Leith’s Lemon & Thyme Bundt
A Bake Off first: Botanicals Week. This week saw the contestants cooking up a classic – so we don’t blame you if you want to give it a go at home. Here’s how to taste it for yourself.
View this post on Instagram
Ingredients
For the sponge
- 325g unsalted butter, cubed and softened, plus extra melted for greasing
- 325g caster sugar
- 5 eggs
- 325g self-raising flour
- 1 tsp baking powder
- finely grated zest of 3 unwaxed lemons
- 4 tbsp thyme leaves
- juice of 1 lemon
For the lemon-thyme syrup
- juice of 2 lemons
- 100g caster sugar
- small bunch of thyme
For the crystallised lemon and thyme
- 1 unwaxed lemon
- 100g caster sugar, plus extra for sprinkling
- 1 egg white, beaten
- 5 thyme sprigs
For the icing
- 150g icing sugar
- juice of 1/2 lemon
Equipment
- 23cm 10-cup bundt tin
- 1 baking sheet, lined with baking paper
Method
- Make the sponge. Heat the oven to 180°C/160°C fan/350°F/Gas 4. Generously grease the bundt tin with melted butter, making sure you brush it between the grooves to prevent the sponge sticking when you turn it out.
- Beat the butter and sugar in a stand mixer fitted with a beater, on medium speed for 3-5 minutes, scraping down the inside of the bowl from time to time, until the mixture is pale and creamy. One at time, add the eggs, beating well between each addition, and adding a spoonful of the flour if the mixture starts to curdle.
- Sift the flour and baking powder into the bowl and mix on a low speed until combined.
- Add the lemon zest and thyme leaves and mix until combined. Stir in the lemon juice to give a thick dropping consistency.
- Spoon the mixture into the prepared bundt tin and, using a spatula, gently push the batter into the grooves and up the sides of the tin, then smooth the top. Tap the tin on the work surface to release as many air bubbles as possible. Bake the sponge for 35-40 minutes, until risen and golden, and a skewer inserted into the centre comes out clean.
- Make the lemon-thyme syrup. While the sponge is baking, pour the lemon juice into a small pan, add the sugar and bring to the boil. Add the thyme, turn the heat down slightly and simmer for 10 minutes, until the liquid has reduced to a syrup consistency. Pass the syrup through a sieve into a bowl and leave it to cool. Discard the thyme.
- Make the crystallised lemon. Using a potato peeler, peel the lemon in strips, running from top to bottom, then cut the lemon peel into matchsticks. Place the peel in a small pan, cover with water and bring the water to the boil. Immediately remove the pan from the heat and pass the water through a sieve. Tip the lemon matchsticks back into the pan and repeat the boiling and draining process once more to get rid of any bitterness in the peel.
- Place the drained lemon matchsticks in a pan with the 100g of caster sugar and 100ml of water and bring to the boil. Turn the heat down slightly and simmer for 15 minutes, until the peel strips are translucent and soft. Pass them through a sieve, then spread the strips out on the lined baking sheet and sprinkle them with sugar. Toss to coat each piece of lemon peel in the sugar.
- Make the crystallised thyme. Pour the egg white into a shallow dish and lay the thyme sprigs in it. One by one, remove the sprigs and wipe them almost dry with kitchen paper. Place them next to the lemon peel and sprinkle with sugar. Leave the sheet in a warm place for the thyme and lemon peel to crystallise and dry out.
- Meanwhile, remove the bundt from the oven and leave it to cool in the tin for 5 minutes, then turn it out onto a wire rack.
- While the sponge is still warm, use a thin skewer to prick holes over the surface and brush with the lemon-thyme syrup. Be patient and allow the syrup to sink into the sponge before adding more, then leave the bundt to cool completely.
- Make the icing. Sift the icing sugar into a bowl and add enough lemon juice to mix to a stiff, but pourable icing (you may not need all the juice). Spoon the icing over the bundt cake, leaving it to drip down the ridges, and then decorate with the crystallised lemon and thyme.
Week 7: Dessert Week
Paul Hollywood’s Orange & Ginger Treacle Puddings
It was a rather messy week on Bake Off this time round, especially when it came to the dreaded Technical Challenge. Paul’s oven-steamed puddings proved a tough challenge for the bakers, who struggled to keep their bakes standing (and solid) during the time frame. Think you could pull it off? Try the recipe below.
View this post on Instagram
Makes: 6
Ingredients
For the syrup
- 200g caster sugar
- 3 tbsp water
- 100ml boiling water
- 1 lemon wedge, about 2cm wide
- Juice of 1 orange
- 2 tbsp syrup from stem ginger
For the sponge
- 175g unsalted butter, cubed and softened
- 175g caster sugar
- 3 eggs, beaten
- 185g self-raising flour
- Finely grated zest of 1 orange
- 1 tsp ground ginger
- 3 balls of stem ginger in syrup, rinsed and finely chopped
For the crème anglaise
- ½ vanilla pod, seeds scraped out
- 125ml whole milk
- 125ml double cream
- 3 egg yolks
- 30g caster sugar
Equipment
- 200ml pudding basins x 6, greased, then base-lined with a greased round of baking paper
- 6 chopsticks or thick wooden skewers
- 6 circles of baking paper and 6 circles of foil cut 3cm larger than the top of the pudding basins
- kitchen string
Method
- Make the syrup. Heat 50g of the sugar with 3 tablespoons of water on a low heat, stirring to dissolve. Increase the heat to medium and cook for 3-5 minutes to a golden caramel. Remove from the heat very carefully pour in the boiling water. Add the lemon wedge and the remaining sugar, return the pan to the heat and stir until the mixture comes to the boil. Simmer gently on a low heat for 20 minutes, until light golden and syrupy. Remove from the heat and leave to cool. Once the syrup has cooled, discard the lemon wedge and spoon 1 tbsp of syrup into each pudding mould. Reserve the remaining syrup in the pan.
- Make the sponge. Heat the oven to 180°C/160°C fan/350°F/Gas 4. Beat the butter and sugar in a stand mixer fitted with the beater, on medium speed for 3-5 minutes, until pale and creamy. Gradually, beat in the eggs, then the reserved orange zest. Sift the flour and ground ginger into a separate bowl, add the stem ginger and toss to coat each piece in the flour. Fold the flour mixture into the egg mixture until combined.
- Divide the mixture equally between the pudding basins. Cover the puddings with the baking paper and foil circles (foil on top), securing them with string. Place the puddings in a roasting tin and pour in enough boiling water to come 2cm up the sides of the moulds. Bake for 40 minutes, or until a skewer comes out clean.
- Make the crème anglaise. Heat the milk, cream and vanilla seeds in a pan on a medium heat to just below boiling. In a bowl, whisk the egg yolks and sugar until pale and creamy. Pour in the warmed milk, whisking continuously, then return the mixture to the pan. Stir continuously over a very low heat for 3-4 minutes, until thick enough to coat the back of a spoon. Set aside.
- Return the reserved syrup to the heat and add orange juice and ginger syrup. Reduce to a pouring syrup consistency.
- To serve, turn out the puddings onto serving plates and drizzle them with the warmed syrup. Serve with the crème anglaise.
Week 8: Party Week
Paul Hollywood’s Caterpillar Cake
Is it even a party without a chocolatey caterpillar cake on the table? We think not – and neither does Paul Hollywood, who tasked the bakers with making their own creepy crawly creations. Try your hand at caterpillar catching below.
View this post on Instagram
Serves: 8 to 10
Ingredients
For the sponge
- 5 large eggs
- 125g caster sugar, plus extra for sprinkling
- 80g plain flour
- 50g cocoa powder
For the Swiss meringue decorations
- 4 large egg whites
- 200g caster sugar
- red food colouring paste
- green food colouring paste
- yellow food colouring paste
For the ganache coating
- 300ml double cream
- 200g 54% dark chocolate, chopped
- 15g unsalted butter
For the caterpillar face
- 75g white chocolate
- 50g icing sugar, sifted
- black food-colouring paste
- cornflour, for dusting
- 10g red fondant
- 10g white fondant
Equipment
- 33 x 23cm Swiss roll tin, greased, then lined (base and sides) with baking paper
- 3 small piping bags, each fitted with a small star nozzle
- baking sheet, lined with baking paper
- 7cm round cutter or ring lined with acetate
- small flat plate, lined with a disc of baking paper
- small piping bag fitted with a small plain writing nozzle
Method
- Make the sponge. Heat the oven to 220°C/200°C fan/425°F/Gas 7. Whisk the eggs and sugar in a stand mixer fitted with the whisk, on high speed for 2-3 minutes, until it is pale, thick and leaves a ribbon trail.
- Sift the flour and cocoa powder into the bowl and gently fold it in using a large metal spoon, taking care not to beat any of the air out of the mixture.
- Pour the mixture into the prepared tin and spread it evenly into the corners with a palette knife. Bake the sponge on the middle shelf for 10-12 minutes, until it is well risen, firm to the touch, and starts to shrink away from the sides of the tin. Remove from the oven and reduce the temperature to 120°C/100°C fan/250°F/Gas ¾.
- Place a sheet of baking paper larger than the Swiss roll tin on the work surface and sprinkle with caster sugar. Carefully invert the cake onto the paper and remove the lining paper. Score a line 2cm in from the edge of one of the short sides, making sure you don’t cut all the way through the sponge. Starting from the scored short side, tightly roll up the sponge using the paper to help, then transfer it to a wire rack to cool completely.
- For the Swiss meringue. Tip the sugar into a clean heatproof bowl with the egg whites and salt. Set the bowl over a pan of gently simmering water and using an electric hand whisk, whisk until the sugar dissolves. Continue whisking for 3-5 minutes until the mixture thickens enough to hold a ribbon trail and the temperature on a sugar thermometer reaches 71°C/160°F.
- Spoon the mixture into the bowl of a stand mixer fitted with a whisk attachment, and whisk for 3 minutes until the mixture has doubled in volume and is thick and glossy. Divide half of the meringue between 3 small bowls, leaving the remaining half of the meringue in the mixer bowl.
- Working with the meringue in the 3 bowls, colour one bowl green, one bowl red and one bowl yellow. Spoon each coloured meringue into a small piping bag fitted with a small star nozzle. (If you have only one nozzle, then work with one colour at a time, washing the nozzle in between.)
- Using the red, yellow and green meringue, pipe 7 small meringue kisses of each colour, about the size of a hazelnut, onto the lined baking sheet. Using the green meringue, pipe six legs in an ‘L’ shape, measuring about 2 x 4cm, and six legs in a reverse ‘L’ shape. Pipe two green curved antennae, each about 4cm long. You can use any remaining meringue to pipe flowers to decorate the serving plate or board.
- Bake the decorations for 45 minutes, until dry. Remove from the oven and leave to cool on the baking sheet.
- Make the ganache coating. Put the chocolate and butter in a heatproof bowl and set aside. Pour the cream into a pan and slowly bring it just to the boil. Pour it into the bowl with the chocolate and butter and leave the hot cream to melt them slightly for 1 minute, then stir until smooth and glossy. Leave the ganache to cool and thicken before using.
- Prepare the caterpillar face. Melt the white chocolate in a heatproof bowl set over a pan of gently simmering water, stirring until smooth. Place the 7cm cutter in the middle of the lined plate and pour in the melted chocolate, then leave it to cool and set.
- Make the chocolate Swiss meringue buttercream filling. Melt the chocolate in a heatproof bowl, set over a pan of gently simmering water. Stir until melted, then remove from the heat and leave to cool.
- Gradually add the butter to the meringue in the bowl of the stand mixer, whisking continuously until smooth. Fold in the cooled, melted chocolate. Chill until ready to use.
- Assemble the caterpillar. Unroll the cooled Swiss roll and remove the baking paper. With one of the short sides facing you, make thirteen vertical cuts, 1.5cm apart and 15cm long into the sponge, so you now have fourteen strips of sponge that look like the keys on a piano. Cut the top of each alternate strip to remove seven sponge fingers (blitz or crumble these to make ‘soil’).
- Spread the filling over the sponge and re-roll the Swiss roll tightly from the other (non-cut) short end (the strips will make the ridges on the caterpillar body). Transfer the sponge to a wire rack set over a sheet of baking paper. Carefully pour the thickened ganache over the sponge roll to coat it smoothly, then gently transfer it to a serving plate or board. Arrange the coloured meringue kisses on the ridges of the caterpillar’s body, then set the legs and antennae in place.
- Decorate the face. Mix the icing sugar with a few drops of water and the black food-colouring paste to make a thick icing, then spoon it into the small piping bag fitted with the writing nozzle. Remove the set white chocolate disc from the mould.
- Dust the work surface with cornflour and roll out the red and white fondants until 3mm thick. Cut out two white ovals for the eyes and roll two tiny white balls to add to the pupils. Using the red fondant, cut out two circles for the cheeks and a small tongue shape. Dampen the back of the fondant eyes with a little water and press them in place on the white-chocolate face. Using the black icing, pipe a pupil onto each eye, then pipe a mouth. Dampen the fondant cheeks and tongue and stick them in place on the face. Press a white fondant ball onto each pupil.
- Press the caterpillar face onto the thick end of the Swiss roll – the ganache will help it stay in place. Arrange the meringue flowers and chocolate soil on the serving plate or board, to finish.
Week 9: Patisserie Week
Prue Leith’s Tarte Aux Pomme
It’s patisserie week – and the bakers have been tasked a challenging technical for the semi-final. Prue’s version includes calvados in the frangipane, and the filling sits in a pâte brisée shell – making for a deliciously crumbly, buttery texture.
View this post on Instagram
Serves: 10
Ingredients
For the pâte brisée
- 250g plain flour
- ½ tsp salt
- 150g unsalted butter, cubed and chilled
- 1 large egg, separated
- 2-3 tbsp ice-cold water
For the apple purée
- 600g (about 6 small) eating apples, preferably Cox, peeled, cored and cut into 1cm pieces
- juice of 1 lemon
- 30g unsalted butter
For the lemon syrup
- 100g caster sugar
- juice of 1 lemon
For the frangipane
- 50g unsalted butter, softened and cubed
- 50g caster sugar
- 1 large egg
- 70g ground almonds
- 2 tbsp calvados
For the topping
- 4 large red-skinned eating apples, cored, halved, and cut into 3mm thin slices
- 15g unsalted butter, melted
For the apricot glaze
- 3 apricots, stoned and roughly chopped into 1cm pieces
- 50g jam sugar
Equipment
- 25cm loose-bottomed sandwich or tart tin
- baking beans
Method
- Make the pâte brisée. Tip the flour and salt into a bowl. Rub the butter into the flour mixture with your fingertips until it resembles breadcrumbs. Make a well in the middle, add the egg yolk (reserving the white) and 2 tablespoons of the ice-cold water. Using a table knife, bring the mixture together to form a dough, adding the extra 1 tablespoon of water if needed.
- Lightly flour the work surface, tip the pastry out of the bowl and shape the dough into a ball, then wrap and chill it for 20 minutes.
- Make the apple purée. While the pâte brisée is chilling, tip the apples into a pan, add the lemon juice and butter, then simmer for 20 minutes, until the apples are soft and any liquid has evaporated. Remove from the heat and crush the apples with a potato masher or wooden spoon to a coarse purée. Leave to cool.
- Make the pastry case. Roll out the pâte brisée on a lightly floured work surface to a 30cm round and use the round to line the tart tin. Chill for 20 minutes.
- Heat the oven to 180°C/160°C fan/350°F/Gas 4. Line the pastry case with baking paper and baking beans and bake blind for 20 minutes. Meanwhile, whisk the reserved egg white with a fork. Remove the baking beans and paper and brush the inside of the case with the egg white. Return the case to the oven and bake for 10 minutes to dry out the base. Leave to cool. Turn the oven off for now.
- Make the lemon syrup. Pour 100ml of water into a pan, add the sugar and lemon juice and bring to the boil. Reduce the heat and simmer for 2-3 minutes, until the sugar dissolves. Pour the syrup into a large bowl and leave to cool slightly.
- Make the frangipane. Beat the butter and sugar in a stand mixer fitted with the beater, on medium speed for 3-5 minutes, until pale and creamy. Add the egg and mix until combined. Turn the speed to low, add the ground almonds and calvados and mix until just combined; do not overmix.
- Spoon the cold apple purée into the pastry ease and level it with a palette knife, then spoon blobs of the frangipane on top and spread it out into an even layer.
- Make the topping. Reheat the oven to 180°C/160°C fan/350°F/Gas 4. Place the apple slices in the warm lemon syrup and turn to coat. Working from the outside edge of the pastry case, dab each apple slice on kitchen paper to remove any excess syrup and arrange the slices in concentric overlapping circles. When you reach the middle, slice a few of the apple slices in half so they are wafer thin and shape them into an open rose to fill the hole in the centre of the tart. Brush all the apple slices with the melted butter and bake for 30 minutes.
- Make the apricot glaze. Crush the apricots and jam sugar together in a small pan using the potato masher, then place the pan on a low heat. Leave the fruit and sugar to slump and then increase the heat slightly to bring the mixture to the boil. Immediately reduce the heat again to a strong simmer, and cook for 4 minutes, until you have a jammy consistency. Remove from the heat and pass the mixture through a fine-mesh sieve. Stir 2 tablespoons of water into the purée to give a thin glaze.
- Remove the tart from the oven, leave it to cool for 5 minutes, then brush the top with the apricot glaze.
Featured image: Jennifer Pallian, Unsplash